Take your camera off ‘automatic’: Shooting digital negatives
This is part of a series of blogs to help camera users develop skills, taking their cameras off ‘automatic’.
Digital cameras today are generally capable of producing both RAW and JPEG images. However, many of us only use JPEGs as they can be shared right away, without processing. In contrast, RAW format is sometimes described as the equivalent of a ‘digital negative’ because it contains all the data recorded by the sensor, permitting the photographer to choose options for the final image, just as one would in a darkroom with a negative.

A negative?
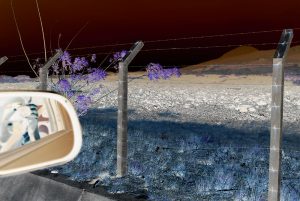
Thinking about a negative, might evoke memories only those odd colours and amber edges that were the hallmarks of colour film negatives. This reversal of colours and tones was characteristic of negatives made to be printed on paper using an enlarger that shone a beam of light through the semi-transparent negative onto light-sensitive paper, which was then developed into a print. Analogue photographic techniques, as people say today, different from digital.
Printing in a darkroom requires the photographer to make choices that affect the final appearance of the images. There are so many options, from choosing the paper – from the surface and response to light, to other characteristics like the weight and feel of the paper itself. In a darkroom, one can burn in highlights or dodge shadows (so they are less dark). One can print with filters, too, even in black-and-white. For example, in my youth, I was very fond of extreme high-contrast prints, which I produced with a combination of paper choice and use of a filter between the negative and the paper. Today, as my taste has changed, I am more fond of black-and-white papers which can show a subtle variation of grey tones.
Because there are so many options with negatives, printers used to use standards like ‘the Shirley’, to benchmark their processes and make sure that what customers received was more-or-less what they expected.
Digital negatives
So, the description of the RAW data as a digital negative, is not because it shows odd colours but because so much is possible in processing the image. One may need to use Photoshop or other software programme, as the negative is digital, but the data is present in the RAW and can be evoked, teased out, subdued: the options are many.
JPEGs, on the other hand, are processed images. Taking a JPEG directly from a camera is the equivalent of sending your roll of film away for processing, and letting someone else make all the decisions about how the negative should be turned into a final image. Or, if you like cake, the difference between baking a cake yourself and buying one in the supermarket. (Not even buying it from the baker: the photographic equivalent to buying a cake from the baker, is getting a print made in a shop where more time and attention is taken with the printing. However, it is still someone else making the decisions.)
A RAW image can appear a bit less exciting when it lacks the modifications applied by the camera in the course of creating the jpeg. And each camera manufacturer tends to have its own individual format for the RAW data, sometimes requiring special plug-ins to see images from new cameras. Adobe has its own form of RAW, called DNG, digital negative – originally meant to be universal. Canon, Fuji, Kodak, Minolta, Nikon, Olympus, Pentax, and Sony each have at least one for their cameras.

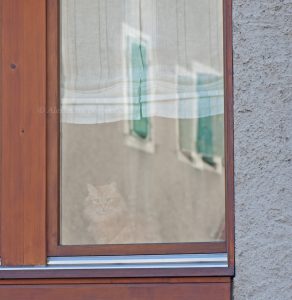
Using the RAW to pick apart some of the mid-range tones, helped make the cat in the window clearer in this image. Although not much work may be needed to produce a final image you like, the RAW image has the data to make processing possible when it is needed.
JPEG, by the way, stands for ‘joint photographic experts group’, a group which developed a form of compression of the picture data. Wikipedia assures the reader that the 10:1 compression produces little degradation of quality of image for the human eye. And JPEGs are very useful – not only when one wants a smaller size file and a compressed image will do. It is a JPEG that is shown if you view a photo in the camera. I use JPEGs as a final image – the ‘print’ from the ‘negative’. After I have made my darkroom choices, I save my image as a JPEG. That the adjustments made to the RAW are saved with the image, is perfect at that stage. I want the photo to look the same when printed or viewed by someone else: I want my choices in the ‘darkroom’ to be part of the photo.
Take back control
The difference between a JPEG made from processing the RAW photo, and the JPEG straight out of the camera, is who is making the decisions. Many cameras today offer pre-set modules of JPEG processing, such as Fujifilm’s mimicking of its own film types. There are many exciting in-camera processing projects, applying sharpening, colour enhancement, black-and-white, and more. There are certainly times when it is more useful to shoot JPEGS: for example, when the pictures are just snapshots for fun, just as one might send a roll of film to the lab when the photos are more for fun than for art. Some people only ever enjoy cake from the supermarket and don’t miss the taste of home-made baking. Which are you?